





































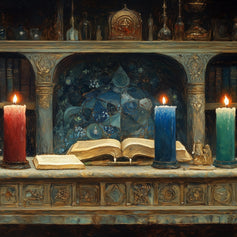
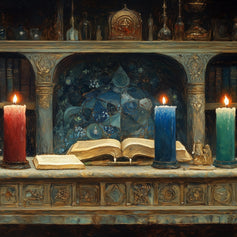
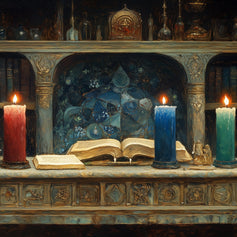






































A candle chosen for its color, an oil suited to your request, and a few words you took the time to prepare: anointing gives the ritual working a tangible beginning. It connects matter, intention, and action. A green candle dedicated to prosperity does not convey the same meaning as a white candle consecrated to protecting the home, even when their preparation follows the same steps.
To anoint a candle, apply a light trace of anointing oil to the sides of a cold candle suited to this use, in the direction chosen for your intention. Leave the wick and top untouched. Then prepare the dedication, place the candle in its holder, and light it once the anointing materials have been put away. This guide explains each step with our magical oils, our ritual candles, and complete examples for your practice.
Why anoint a candle before a ritual?
In magical practice, anointing reserves the candle for a specific purpose. You are no longer preparing merely a light: you are dedicating this support to a named request, such as protecting a place, welcoming love, or opening a new chapter. The chosen formula, color, and words all contribute to the same working.
Intention gives direction; oil gives the support a ritual identity. A Riches formula is chosen for prosperity, while a Clairvoyance formula is chosen for divination. Anointing lets you take this choice in hand, refine it, and then express it. This is not a race to use the greatest quantity: you are seeking consistency among the elements of the rite, not a candle covered in liquid.
Consecrating and anointing do not refer to exactly the same act. Consecration dedicates an object to a purpose; anointing is a way of accompanying that dedication with oil. A prayer can therefore consecrate a candle without applying anything, while anointing finds its meaning in the request that accompanies it. The two can come together in a very simple preparation.
You can also use a candle as sold, especially when it has already been prepared for a specific working. Anointing is not a step that must be added systematically to every product. It has its place when the candle, oil, and ritual are compatible.
Where does anointing come from in ritual traditions?
Exodus chapter 30 describes a fragrant oil for consecrating sanctuary and priestly objects. This text associates anointing with religious dedication, with a composition and use reserved for that purpose. It does not present a recipe for making today's colored candles. Nevertheless, it sheds light on an ancient idea: the act of anointing can mark the transition of an ordinary object to a sacred function. [1]
In contemporary Hoodoo teachings, preparing candles with oils is among the operations described by the English term dressing. Catherine Yronwode notably presents inscriptions, written petitions, and directions of application. Her account also shows that practices vary according to methods and candle formats. [2]
You can study these traditions without conflating them. A Christian novena, a Hoodoo working, and a celebration of the Wheel of the Year do not necessarily use the same words or calendar. For your preparation, begin with the rite you wish to perform. An understood gesture has more place in your practice than an accumulation of prescriptions borrowed from several books.
What materials are needed to anoint a candle?
A candle, an oil, and an applicator
Gather a candle with accessible wax, an oil intended for anointing this support, and a small applicator reserved for this purpose. A clean, fine brush that does not shed bristles allows for a light application. A small dish holds the amount taken; it must not subsequently be used to serve food.
The Aeternum oils concerned are intended for ritual, non-food, and non-cosmetic use. The brush allows you to apply them without wetting your fingers. There is no need to coat your palms or wrists to establish a connection with the candle: dedication and your attention fulfill this function in the work.
Also prepare a clean cloth for the table, a notebook, and, optionally, a petition paper. You can prepare everything before opening the bottle. A simple setup avoids having to look for an accessory while holding an already oiled candle.
A candle holder chosen with the candle
Compare the candle’s diameter with the holder’s opening. The candle should stand upright without excessive looseness and without needing to be forced in. Our candle holders let you choose a model according to its use and appearance. The design matters for the altar, but stability matters for use.
The holder should rest on a stable, heat-resistant surface. Clear the surrounding area rather than placing papers and plants all around it. Prepare your extinguishing method now. The London Fire Brigade’s guidance emphasizes the holder, keeping combustible materials at a distance, and having someone present during use. [3]
Which candles can be prepared by anointing?
A plain wax candle, without applied decoration, offers a surface that is easy to prepare. Read its instructions and those for the oil: the stated use should correspond to the intended action. Its elongated shape makes it easy to clearly distinguish the top, base, and sides. It also facilitates learning a direction of application.
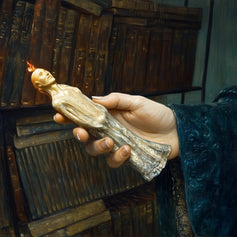
A figurative candle requires the same care, with raised details that can retain the product. You do not need to fill every hollow or apply oil to the facial details or the top. To begin, choose a simple candle; you can explore another format with its instructions later.
A scented candle, metallic finish, glued decoration, or candle that has already been prepared should not automatically be treated like bare wax. Do not add anything when the manufacturer prohibits it. The name “ritual candle” does not replace the instructions specific to the model. Our collection of esoteric candles brings together several formats, each retaining its intended purpose.
Container candles require an additional distinction: their wax walls are not directly accessible. Their preparation is covered in a later section. Do not try to reproduce a side application by simply pouring the same amount on top.
Which oil should you choose based on the color and intention?
Start with the request, then choose the formula and color. At Aeternum, the Wealth, Love, Protection, and Clairvoyance product pages indicate the candles that accompany their use. These associations provide a practical starting point: you do not need to invent a complex combination for your first working.
The table sets out these correspondences and distinguishes them from the choice proposed for a Mabon celebration. The words “attract” and “ward off” refer here to the direction of the magical work; they promise neither an automatic result nor a set timeframe.
| Oil and intention | Candle color | How to direct the request |
|---|---|---|
| Protection | White or black. | Welcome protection with white; affirm a protective distance with black. |
| Love | Pink or red. | Dedicate the work to shared love, tenderness, or romantic life. |
| Wealth | Yellow or green. | Give form to a request for prosperity and material development. |
| Road Opener | Yellow or green. | Prepare for the opening of a path and the welcoming of new possibilities. |
| Clairvoyance | Blue. | Prepare time for divination and openness to symbolic interpretation. |
| High John | Green or yellow. | Focus the work on courage, success, and the ability to present yourself confidently. |
| Mabon | Orange, offered here for the season. | Dedicate the light to gratitude and the harvest during the celebration. |
The Aeternum workshop formulas
The product pages for our Protection, Love, Wealth and Clairvoyance oils feature French manufacturing and bottles sealed with wax. Their compositions also give each preparation its identity: tourmaline and mistletoe for Protection, rose and rose quartz for Love, dandelion and citrine for Wealth, and lavender and amethyst for Clairvoyance. These materials are part of the bottle's preparation; they must not be removed to dress the candle.
You are therefore choosing a formula for its ritual purpose, not merely for its scent. The guide to anointing oils explains the differences between intentions, preparation categories, and other possible tools. For the candle, keep one main formula whose use you understand.
Richesses, Road Opener, and High John are not interchangeable
For a professional project, the request may concern three distinct aspects. Richesses relates to prosperity. Road Opener focuses on opening paths. High John is chosen in particular for work involving strength and success. Identify what you want to prepare before bringing several bottles together.
Does a professional opportunity mainly require finding an opening, asserting your place, or supporting the development of an activity? This question helps you choose the working. It prevents you from treating a green or yellow color as sufficient instruction to mix everything together.
How should you formulate your intention before anointing?
Write a sentence that fits on one or two lines. A good dedication names the subject and the desired quality: “I dedicate this light to the protection of my home and the peace of those who live there.” For prosperity: “I dedicate this candle to the growth of my business and to fair exchanges.”
Specify the work rather than asking for everything at once. A candle dedicated to a project may concern its launch, a preparation stage, or the continuation of the activity. You can begin another working when the objective changes. Precision also makes it easier to close the session.
For love, direct your request toward a freely shared bond. For protection, name what you are protecting without necessarily seeking an adversary. For success, leave room for the practical steps that depend on you. The rite supports your commitment; it does not need to override other people’s freedom.
Read the phrase before taking the applicator. You can then repeat it during the action, or remain silent while holding a clear intention. Hesitating over the words does not require you to restart the entire preparation. Simply return to your phrase at the moment of dedication.
How should you prepare the bottle and wax?
Opening a sealed bottle
Place the bottle upright on a clear surface. Carefully remove the sealing wax around the stopper without heating the container. Remove any loose fragments before opening. The seal is part of the product’s ritual presentation; the stopper keeps it closed after use.
Take it out without letting wax, dust, or plant matter fall into the dish. If a fragment obstructs the opening, clear it away rather than forcing the cap with the bottle balanced on top. Never hold the bottle over a flame to liquefy the seal.
Preparing a cold candle
Remove the packaging and check the candle’s condition. Gently wipe away any dust with a dry, lint-free cloth. There is no need to wash the wax with alcohol, vinegar, or salt water. Leave the candle at room temperature; heating does not help you perform a more precise anointing.
Your table may receive a short preparatory statement. Fumigation remains optional and separate from handling the bottle. The home purification guide offers methods with or without smoke. You can keep this initial work entirely combustion-free until lighting the candle.
Should you engrave a name or symbol into the candle?
Engraving provides a visible reference for your request. It is optional: an oral dedication or a separate piece of paper may be sufficient. On suitable wax, write a word, initials, or a symbol you understand. “Peace,” “prosperity,” or the name of your project offer an immediate interpretation.
Engrave before anointing, on the cold candle. Place it on a clean surface that prevents it from rolling. A small suitable stylus allows for a shallow inscription without a heated blade. Keep your fingers out of the tip’s path and do not carve a groove that weakens the candle.
You can orient the writing in the same direction as your anointing gesture. This consistency helps build the ritual; there is no need to redo the candle if the letters are not perfectly aligned. Avoid long inscriptions that require you to go over the same spot several times.
Remove any loose shavings before applying the oil. Do not insert a pin, paper, or plant into the wax. For a candle whose surface does not allow clean engraving, simply write on a separate sheet of paper. The inscription still serves its purpose without altering the object.
In which direction should you apply the oil to the candle?
The convention used in our guides is as follows: from the top toward the base to attract; from the base toward the top to move away. The top refers to the upper part of the sides, not the wick. In both cases, keep the gesture on the outer wax, without adding anything to the top or to the area where the wax melts around the wick.
| Direction of the work | Meaning of the gesture | Example wording |
|---|---|---|
| Attract and welcome | From the upper part of the sides toward the base. | “I welcome protection, shared love, or favorable opportunities for this project.” |
| Move away and clear | From the base toward the upper part of the sides. | “I dedicate this work to driving away whatever disturbs the peace of my home.” |
| Follow a transmitted rite | The convention explicitly given by this method. | Keep the same direction and reference points throughout the work. |
The request determines the direction, not just the color
A protection can be formulated as welcoming a safeguard or as driving away an undesirable influence. These two formulations explain the two possible gestures. With a white candle and Protection, you can choose welcoming. With a black candle and the same oil, you can choose driving away. The color and the words then accompany the chosen direction.
For Road Opener, “opening a possibility” and “removing an obstacle” may belong to the same subject. Nevertheless, choose one main formulation for the session instead of moving the brush alternately up and down. The example proposed below adopts welcoming a new possibility.
Why do other books specify a different gesture?
Conventions are not universal. Catherine Yronwode’s presentation, for example, gives an upward movement for attraction and a downward movement for repelling. This difference reminds us that the direction of the gesture belongs to a method, not to a common law applying to all magic. [2]
You can follow the Aeternum convention or that of a specific teaching. Simply avoid changing it with every stroke. A method from the center toward the ends also requires an explanation of its function in the rite concerned; it is not an additional step to combine with the other two.
How much oil should be used?
Anointing is not soaking. For the method presented here, the visual guideline is a very light film, with no running drop, ridge, or wet surface. The wax retains its appearance and the grip remains secure. The amount needed depends on the candle’s size and the product’s instructions; there is no number of drops suitable for every candle.
Take a very small amount into the dish, then barely load the tip of the brush. Remove the excess on the edge of the container before touching the wax. Make one stroke and observe the result. If the brush leaves a visibly wet mark, it is already carrying too much product for this light application.
You do not need to saturate the entire circumference. A few thin strokes along the available surfaces are enough for the ritual gesture. Keep the area you hold and the part inserted into the candle holder free of oil. The product must not reach the holder by dripping.
The flowers, roots, or mineral fragments present in some bottles remain in the preparation. Take only the small amount of liquid needed. Their presence does not justify emptying the bottle onto a saucer or transferring its contents onto the candle.
A light application does not exempt you from following the candle’s instructions. When its instructions prohibit additions, leave it unoiled. The dedication can be spoken aloud, or the oil can be given another purpose specified in its product information.
How do you perform the anointing step by step?
Set up the candle and reread the intention
Gather all the accessories, then check that the candle is secure in its cold holder. Remove it if necessary for engraving and application. Reread your phrase and choose the direction of the movement. You can prepare the working while seated; nothing requires an uncomfortable posture.
Take the oil without touching it with your fingers
Pour or take the minimum amount into the dish, according to the bottle’s instructions. Close the bottle. The brush picks up a trace of liquid, then is wiped on the rim. If several formulas are used for separate workings, use a clean applicator for each one or clean it according to the appropriate instructions before reusing it.
Make one even pass
Hold the candle by a clean section, above the preparation surface, or work on a perfectly stable candle in its cold holder. Place the brush on one side and follow the chosen direction. Lift it to return to your starting point instead of rubbing back and forth.
Gently turn the unlit candle to access another side if necessary. Continue with the small amount of product already on the applicator. You may say your phrase once during the entire process. Three identical passes are not required; the anointing is complete once the holder has received the planned light application.
Check the surface before lighting
Examine the candle in the light. The wick, top, and engravings should contain no residue or buildup. Remove any excess from the sides before introducing a flame, without leaving any fibers behind. If the wick is soaked, if a hollow contains liquid, or if the candle has become slippery, set it aside: do not light it to “burn off” the oil.
Set up, dedicate, and light
Put the candle back in its holder, put away the applicator, and move the dish and bottle away. Check the area around the candle holder. Say the dedication, then light the candle. From this moment on, the anointing is complete: do not apply anything else to hot wax or to a candle that is already lit.
Where should I place the paper, herbs, and powders?
A preparation can bring together several supports without attaching them to the candle. The paper carries the request; a plant represents a correspondence; the salt may mark protection. Their place on the altar expresses their relationship to the ritual. They do not all need to burn to participate in the work.
Write the request on paper that you can reread. Place it on another part of the table, away from heat and drips. Do not slip it into the wax or under a hot candle holder. For a photograph, maintain the same separation: it represents the subject of the work without becoming fuel.
Dried botanicals incorporated into a candle can enter the liquid wax and then catch fire. The National Candle Association has studied this problem in candles containing flowers, leaves, or herbs near the flame. For your home preparation, therefore, keep plant materials in a separate container, outside the hot zone. [4]
| Additional support | Suggested placement | Function in the preparation |
|---|---|---|
| Request paper | At a distance from the candle holder, in a designated place. | Name the work and preserve its wording. |
| Photograph or written name | On a separate support, without contact with the wax or flame. | Represent the subject of the dedication. |
| Plants and petals | In a separate dish, away from heat. | Express a plant correspondence without coating the candle. |
| Ritual powder | On the support and according to the uses specified in its own product information. | Support the work without ending up on the wick or in melted wax. |
| Protection salt | In its dedicated dish or tray. | Materialize a boundary; do not use it to brace the candle. |
| Stone or talisman | In its place on the altar, without contact with the hot candle holder. | Receive a dedication or represent a lasting intention. |
Our magical herbal shop and our ritual powders allow you to explore these correspondences in greater depth. Use only materials whose function and use you understand. The guide to salts in magic explains, in particular, arrangements on trays and in small dishes, which are distinct from anointing.
How should the practice be adapted for a novena candle or a candle in a container?
The body of a novena candle remains in its container. You therefore do not have the same access to the wax as with a freestanding candle. Do not pierce the top, remove the wax, or pour oil into the space around the wick to imitate side anointing.
The inclusion of preparation recipes in a manual does not guarantee their compatibility with your product. Without explicit instructions from the manufacturer for a specific addition, use the novena candle without modifying it. The prayer, dedication, and paper placed at a distance already give the work form.
When you wish to use an oil as an addition, choose another support authorized by its product page and compatible with its material. Protection oil can, for example, accompany a suitable talisman, kept separately from the light. It is not necessary to oil the label or container of the novena candle.
This distinction leaves room for each format: the free-standing candle for learning anointing on the sides, and the novena candle for a prayer appointment according to its instructions. You can choose either one without considering oil-free preparation an incomplete version of the rite.
Seven examples of preparation with Aeternum oils
The following examples offer personal procedures based on the uses of our oils. They follow the method of light application on a compatible candle. Choose only one working for your first session and plan its closing before lighting it. The words can be adapted to your spiritual path.
A white candle for protecting the home
Choose a white candle and Protection oil. Prepare a paper with a request for the home, then place it at a distance from the candleholder. You can begin after tidying a room or when moving into a new home. The focus of the work is the home you wish to protect, not a threat to seek out.
On the cool wax, engrave “Peace in the home” or keep this wording on the paper. Apply the veil of oil from the top toward the base: you choose to welcome protection. Then dedicate the candle with these words: “I consecrate this light to the protection of this home, respect for its threshold, and the peace of those who live here.”
Light it, then take some time for prayer or contemplation. At the end, announce the close of the session and extinguish it. Once the materials are cool, put them away and give the paper a place in your journal or devotional space. You can extend this work by tending to the space, as described in our home purification guide.
A black candle to affirm a protective boundary
The black candle with Protection oil allows for another formulation: distancing what disturbs your space. Choose a precise request, such as ending intrusions that encroach on a period of rest. A protective statement can remain firm without seeking revenge.
Write a brief word, such as “Boundary,” then apply a line from the base upward, only on the sides. You may say: “I dedicate this candle to distancing what disturbs my peace. I preserve my space and the boundaries I have chosen.” Close the bottle and finish the preparation before lighting it.
During the ritual, return to the boundary you wish to maintain. Do not try to infer the name of a person responsible from a flame. At the end, extinguish the candle and note an action within your reach: clarify your availability, organize your space, or express a boundary. The white and black candles represent two possible approaches here; there is no need to use them together.
A pink candle for shared love
Prepare a small pink candle with Love oil for a request for tenderness and reciprocity. The red candle is the other color indicated on its product page, for a dedication more focused on passion. Choose the one that best expresses your current intention.
Engrave “Shared Love,” or write your request on a separate piece of paper. Anoint from the top to the base. The dedication may be: “I welcome love freely shared, sincerity in words, and the joy of meeting. I dedicate this light to the tenderness I wish to give and receive.”
You may place a few petals in a dish set at a distance, without sticking them to the wax. After lighting the candle, take some time for your prayer and intention. For a couple, this moment may precede a conversation or a date chosen together. Finish with a word of thanks, then extinguish the candle. A lack of any particular sensation does not mean you need to add more oil or repeat the session that same evening.
A green candle for the prosperity of a business
Pair the Riches oil with a green candle, or with a yellow candle according to your preference. Name the activity concerned: a business, a creative endeavor, or a sales project. Separately prepare a piece of paper with its name and a dedication phrase. Keep it outside the heated area.
After optionally making a light engraving, apply the oil from the top to the base. Say: “I dedicate this light to the prosperity of my business, recognition of my work, and fair exchanges. I welcome the opportunities for growth that I am prepared to support.”
The candle’s burning time can accompany a prayer or the reading of your commitment. Extinguish it before moving on to preparing your business documents: they should not pile up around the flame. After the session, choose a concrete step, such as presenting an offer or reconnecting with a client. Ritual work and action complement each other without turning the candle into a promise of income.
A yellow candle to open a new path
Choose Road Opener Oil with a yellow or green candle, the two colors mentioned on its product information. This preparation suits an intention of opening: you want to restart a search, move beyond a project dead end, or consider another possibility.
Write down what you are seeking to open, without recounting the entire story of the difficulty. A phrase such as “a new path for this project” provides a clear direction. Here, the anointing goes from the top toward the base, because the working concerns welcoming a possibility. You can say: “I consecrate this light to opening my paths. I welcome the possibilities suited to this project and make myself available to recognize them.”
Light it, keep it as part of your ritual time, then close the ritual. In your journal, note an approach that departs from the usual path: another search, a conversation, or a solution to investigate. Road Opener and Riches can concern the same project at different times. Decide their roles before combining them in a single working.
A blue candle before a divination session
Clairvoyance Oil is offered for anointing a blue candle. You can choose a blue candle to prepare your tarot, rune, or crystal-gazing table. Keep the cards, book, and cloth away from the anointing area.
Apply the oil mark from the top toward the base, with an intention of welcoming and openness. Say: “I consecrate this light to attentive divination. I welcome clarity into my reading and retain the discernment necessary for its interpretation.” You may then spend a brief moment before the light.
Extinguish it before setting up a spread that requires the entire surface or draws your attention away from the candle. Put away the anointing materials, then begin the consultation. There is no need to apply the oil to the cards or crystal ball. The Aeternum Tarot Guide can then accompany the reading, which is separate from this preparation.
A light of gratitude for Mabon
Mabon Sabbat Oil is intended for celebrating the autumn equinox. A small orange candle can represent the season in the suggestion presented here. This color choice complements the décor and dedication; it is not a prescription from the oil’s product information.
Prepare a statement of gratitude for the work, harvests, or support received. With a gesture from the top toward the base, dedicate the candle to welcoming this gratitude and preparing for the next cycle. You can say: “I give thanks for what has borne fruit. I consecrate this light to sharing and to the care I give to my household’s resources.”
Food, fruit, and decorative plants remain in place away from the flame. Finish with words of thanks and extinguishing. The Mabon sabbat guide expands on the celebration's references and practices; our Wheel of the Year helps you prepare for the other celebrations.
Should you choose a Moon phase or a particular time?
You can begin with a time when you are available and can fit in both the preparation and the closing. Anointing does not automatically require a full moon or a nighttime hour. A transmitted ritual may specify a schedule; a personal practice can remain more flexible.
To give your practice a lunar rhythm, you can choose the waxing phase as an image of development and the waning phase as an image of closure. The lunar calendar helps you identify these phases. This symbolic choice imposes neither a burning duration nor an obligation to start again after a change of phase.
The planetary hours calculator becomes useful when your method relies on these correspondences. Decide before the session whether the timing applies to the anointing, the lighting, or both. In an open-ended working, preparing the candle during the day for a dedication in the evening remains a possible arrangement.
How should you organize work over several sessions?
First define the rhythm and purpose of this repetition. You can devote three appointments to a project: open the request, revisit your commitment, then give thanks and close. This is an example of organization, not a mandatory number. The candle's format and instructions must allow for the intended use.
Prepare the candle before the first session. At subsequent appointments, recall its dedication and check its condition when cold. It is not necessary to add oil each time you relight it. Continuity can rest on the prayer, the formula, and your notebook, without repeated application.
Do not stick needles into the wax to divide the ritual into timed periods. Instead, write the steps in your notebook. The duration of each burn follows the manufacturer's instructions; the end of a reading or prayer can also mark your appointment, with extinguishing when you stop supervising.
Between sessions, let it cool completely, then store the labeled candle away from heat. Remove all packaging before resuming. If you use several candles for distinct intentions, keep their names and papers separate: you will be able to identify the work without having to guess which formula was used.
A missed appointment does not cancel your preparation. Resume when conditions are suitable, or close the cycle with spoken words. You can also decide that the project has changed and begin another working later with a new candle.
How do I extinguish the candle and end the ritual?
Prepare a closing sentence as clear as the opening one: “This session is over. I keep my dedication and return to my activities.” For a completed cycle, you can give thanks and announce that the work is closed. The ending does not depend on the appearance of a particular sign.
A snuffer allows you to smother the flame without touching the wick with your fingers. The National Candle Association also states that a gentle blow is possible; it advises against water, which can splatter hot wax. Check that the flame is out and wait for the materials to cool before moving them. [5]
Using a snuffer can also correspond to a ritual convention for pausing. This choice does not turn an accidental breath into a mistake that would destroy all the work. You can express continuity or completion with your words, then achieve a complete extinguishing. [2]
A candle must never be left burning while you are away or asleep. Also observe the burning time limit stated on its label, rather than trying to make the last piece of wax disappear. Remaining material does not mean that the dedication is unfinished. [3] [5]
What should I do if the oil runs or the candle burns poorly?
First, return to the materials. Excess liquid, an improperly prepared wick, or an unstable setup requires a concrete adjustment. Do not continue an abnormal burn to reach the intended end of the ritual. You can always close with spoken words and resume with a suitable holder.
| Situation | Point to check | Practical response |
|---|---|---|
| The oil is dripping down. | The brush picked up too much product. | Before lighting, remove excess from the sides without leaving any fibers. Do not light a candle that is still greasy or dripping. |
| A piece of plant material remains on the wax. | Taking some product out also drew material from the bottle. | Remove it completely once cold. The wick and top must remain free of additions. |
| The candle is unstable. | Candle diameter, candleholder opening, and condition of the base. | Change the holder. Do not stabilize it with paper, plants, or a pile of salt. |
| Oil has gotten onto the wick. | The product has reached an area that was meant to remain clear. | Set the product aside and seek advice about it; do not test it by lighting it. |
| The flame becomes unusual or produces heavy smoke. | Wick condition, additions, and installation conditions. | Extinguish it, let it cool, and consult the instructions before resuming. |
| The wax is reaching the accessories. | Insufficient space around the holder. | Extinguish and wait for it to cool before rearranging. Move other materials away. |
| The candle goes out before the prayer is finished | Physical condition and method of use. | Do not add oil to relight it. Finish the words, then examine the candle once it is cold. |
The height of a flame or a wax drip does not demonstrate that a ritual has succeeded, failed, or encountered opposition. A symbolic reading may be part of a divination method; it remains distinct from checking the candle. Note what you observe without turning every detail into a definite message.
How should the oil be stored, and what should be done with the remains?
Close the bottle after each use and keep its label. Store it away from heat, flames, and food products. Removed sealing wax must not be put back into the oil. Clean or replace the applicator according to its material before another use; do not return excess from a dish to the original bottle.
A candle prepared in advance remains identified with its intention and the formula used. Avoid prolonged contact with papers to which the oil could transfer. Check its condition before the session, without assuming that the product has disappeared: oil does not necessarily dry like water.
After the work, wait until everything has cooled completely. Remove the remains according to the nature of the products and the instructions on their packaging. Do not scatter wax, oil, or salt in the soil or in a watercourse. The closing can be done neatly at home, with a thank-you and tidying up.
The paper can be added to your notebook or destroyed without fire when you are finished. A talisman can remain in place if its dedication continues. You do not need to keep all the residue to preserve the memory of the work: a few lines about the intention and date are enough.
Frequently asked questions about anointing candles
Is it absolutely necessary to anoint a candle in order to practice?
No. Anointing is one preparation step among others. A candle can accompany a prayer or receive a dedication without any addition. Choose the oil when its use suits the medium and the rite, not to correct a feeling of inadequacy.
Can an essential oil be used instead?
Do not replace an anointing oil with an essential oil, perfume, or food preparation merely because they look alike. Their compositions and uses differ. Choose a product whose use on candles is indicated and follow the candle’s instructions.
Should the oil be applied with the right hand?
The brush can be held in whichever hand gives you the best control. A school’s conventions may give gestures a different meaning, but being left-handed does not prevent you from practicing. You do not have to apply the product to the skin to honor a dedication.
How many drops should be put on a candle?
There is no number that applies to all sizes and formulas. Follow the product instructions, then look for a thin layer without any dripping. Do not count drops poured directly onto the top: the liquid is drawn separately for controlled application to compatible surfaces.
Should the oil be left to dry overnight?
Any waiting period depends on the preparation and its instructions. Waiting does not correct an excess: check the surface before lighting. You can prepare the candle in advance, but oil that remains greasy the next day should not be considered evaporated.
Can several oils be mixed on the same candle?
Start with a single formula. Several intentions can form a coherent working, but they do not automatically make a mixture appropriate. Without a specific method and an indication of compatibility, keep the preparations separate. Adding more oil is not a measure of power.
Can a white candle replace another color?
In a personal practice that allows it, you can choose a white light and specify the request aloud. When following a guide or rite with a specified color, it is better to keep that correspondence. Our oil guides provide reference points for preparing a coherent set.
Should the plants in the bottle be added?
No. The flowers, roots, and mineral chips are part of the product’s composition. They remain in the bottle. To present a plant correspondence on the altar, choose a separate material in a small dish placed away from the candle.
Can you give away a candle that has already been anointed?
A prepared candle should remain identifiable and be accompanied by useful information about the product and its use. For a first gift, a candle and an oil in their packaging, with their instructions, allow the recipient to choose their own dedication. Do not prepare a personal intention for them without their consent.
What should you do if you used the wrong direction?
The direction is a working convention. A mistake does not require adding a new layer to erase the previous one. Stop the application, recall your intention, and decide whether to continue the dedication or reserve another candle for this working. Avoid washing it with solvent to start over.
Can the same candle be reused for another intention?
For a clear preparation, dedicate one candle to one working. It may be used for several sessions in the same cycle when its condition and instructions allow. For a different request, another candle avoids layering oils and causing confusion in your journal.
Is a new anointing needed after an interruption?
No. After extinguishing and cooling, resume the dedication when you are available. Examine the candle and prepare the wick according to the instructions. Recalling your intention marks continuity; adding more oil is not necessary every time you resume.
Preparing a light that corresponds to your work
A successful anointing is easy to review: you know why you chose the candle, which oil corresponds to it, and what the direction of your application means. Engraving, paper, and other materials can enrich this framework, but each has its place. A restrained preparation leaves more attention for the dedication and the progression of the rite.
To put together your set, explore our ritual candles, Aeternum anointing oils, and candle holders suited to your setup. Start with an intention, a candle, and an understood formula. You can then develop your practice with the guides and correspondences that give meaning to each gesture.
Sources and further reading
[1] Anointing as consecration. AELF, Book of Exodus, chapter 30, verses 22–33, liturgical translation. This passage concerns oil reserved for the sanctuary and priesthood.
[2] Preparing candles in a Hoodoo teaching. Catherine Yronwode, How to Practice Hoodoo Candle Magic, sections on preparation, inscriptions, and extinguishing. The practices described belong to this framework; product usage instructions must still be followed.
[3] Holders and supervision. London Fire Brigade, Candles — Fire safety at home, setting up and extinguishing household candles.
[4] Botanicals and melted wax. National Candle Association, NCA’s Report on Botanical Candles, an overview of tests on botanical materials that enter the combustion zone.
[5] Burning and extinguishing. National Candle Association, Candle Safety Tips, guidance on the wick, extinguishing, and cooling. For oils and colors, Aeternum product pages are linked directly in the guide.

Par Olivier of Aeternum
Passionate about esoteric traditions and the history of the occult from the earliest civilizations to the 18th century, I share some articles on these topics. I am also co-creator of the online esoteric shop Aeternum.











Bonjour,
Je vous remercie pour votre commentaire, et vous avez totalement raison : une erreur s’est glissée dans notre ancien article Magie des bougies ! Nous l’avons – grâce à vous – réécrit et corrigé. Je vous confirme ce sens : du haut vers le bas pour attirer, du bas vers le haut pour bannir.
Bien cordialement,
Olivier – Aeternum
J’aurais dit pour attirer, en descendant donc de la mèche à la base et pour repousser, l’inverse.
Mais comme d’un article à l’autre, vous ne dites pas la même chose, je vous avoue que je suis perplexe.
J’ai relu une bonne dizaine de fois pour être sûre d’avoir bien compris.